The Android platform provides resources for handling media playback, which your apps can use to create an interface between the user and their music files. In this tutorial series, we will create a basic music player application for Android. The app will present a list of songs on the user device, so that the user can select songs to play. The app will also present controls for interacting with playback and will continue playing when the user moves away from the app, with a notification displayed while playback elapses.
Looking for a Quick Solution?
If you're looking for a quick solution, there's a great collection of Android app templates over at Envato Market.
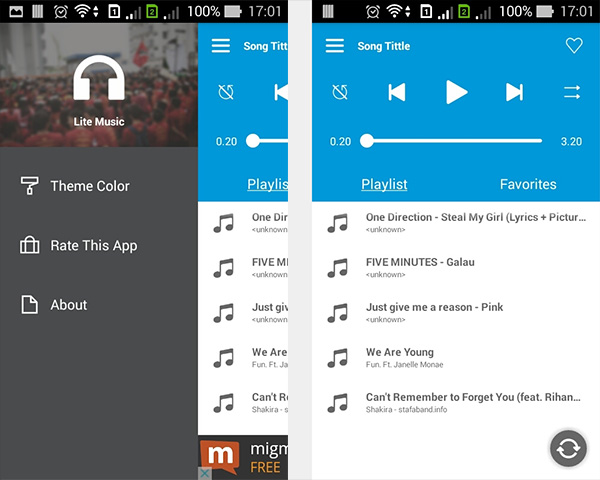
In particular, this Android Music Player app template is a great way to get started with building your own app. "Lite Music" is a premium player app template in Android, with a clean interface, that's simple and elegant to use.
In particular, this Android Music Player app template is a great way to get started with building your own app. "Lite Music" is a premium player app template in Android, with a clean interface, that's simple and elegant to use.
iNSTRUCTIONS
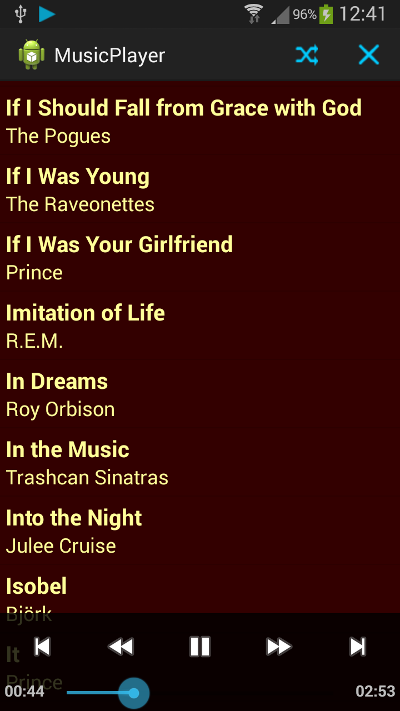
Building the music player will involve using the ContentResolver class to retrieve tracks on the device, the MediaPlayer class to play audio and the MediaController class to control playback. We will also use a Service instance to play audio when the user is not directly interacting with the app. You should be able to complete this series if you're an intermediate Android developer, so if you've already built a few apps, then this series shouldn't be a problem for you. Here is a preview of the final app:
1. Create and Configure a New Project
Step 1
Create a new Android project. If you are using Eclipse, then let the IDE (Integrated Development Environment) create a main Activity class and layout file for you. For some of the code we use in the series, you will need a minimum API level of 16, so you will need to take additional steps to support older versions. Once your project is created, open the project's Manifest file. Inside the manifest element, add the following permission:
Create a new Android project. If you are using Eclipse, then let the IDE (Integrated Development Environment) create a main Activity class and layout file for you. For some of the code we use in the series, you will need a minimum API level of 16, so you will need to take additional steps to support older versions. Once your project is created, open the project's Manifest file. Inside the manifest element, add the following permission:
<uses-permission android:name="android.permission.WAKE_LOCK" />
We will use this permission to let music playback continue when the user's device becomes idle. Your Manifest should already contain an element for your main Activity class. Add the following attributes to the activity element to set the screenOrientation and launchMode:
<service android:name="com.example.musicplayer.MusicService" />
Alter the package name to suit your own and change the class name if you wish.
Step 2
Open the project's main layout file and replace its contents with the following layout:
Open the project's main layout file and replace its contents with the following layout:
<LinearLayout xmlns:android="http://schemas.android.com/apk/res/android"
xmlns:tools="http://schemas.android.com/tools"
android:layout_width="fill_parent"
android:layout_height="fill_parent"
android:orientation="vertical"
android:background="#FF330000"
tools:context=".MainActivity" >
<ListView
android:id="@+id/song_list"
android:layout_width="fill_parent"
android:layout_height="wrap_content" >
</ListView>
</LinearLayout>
Makes sure to alter the tools:context attribute if your main Activity class is named differently. The layout includes a ListView in which we will present the list of songs.
We are going to include two menu items for toggling the shuffle function and for exiting the app. Open your main menu file (res/menu/main.xml) and replace its contents with the following:
We are going to include two menu items for toggling the shuffle function and for exiting the app. Open your main menu file (res/menu/main.xml) and replace its contents with the following:
<menu xmlns:android="http://schemas.android.com/apk/res/android" >
<item
android:id="@+id/action_shuffle"
android:icon="@drawable/rand"
android:orderInCategory="1"
android:showAsAction="always"
android:title="Shuffle"/>
<item
android:id="@+id/action_end"
android:icon="@drawable/end"
android:orderInCategory="2"
android:showAsAction="always"
android:title="End"/>
</menu>
<item
android:id="@+id/action_shuffle"
android:icon="@drawable/rand"
android:orderInCategory="1"
android:showAsAction="always"
android:title="Shuffle"/>
<item
android:id="@+id/action_end"
android:icon="@drawable/end"
android:orderInCategory="2"
android:showAsAction="always"
android:title="End"/>
</menu>
If you prefer, you can store the title strings in the res/values/strings.xml file. The two items refer to drawable files. Create your own or use these two images to start with:
 |  |
We will also use an icon to display in the playback notification. Create one now or use the one below:

The code will refer to the images using the names rand, end, and play so make sure that you use the same file names. Copy the images to your project's drawables folder(s). We will implement the actions later.
2. Query the Device for Songs
Step 1
Let's query the user's device for audio files. First, add a new class to your project, naming it Song. We will use this class to model the data for a single audio file. Inside the class declaration, add three instance variables for the data we want to store for each track:
Let's query the user's device for audio files. First, add a new class to your project, naming it Song. We will use this class to model the data for a single audio file. Inside the class declaration, add three instance variables for the data we want to store for each track:
private long id;
private String title;
private String artist;
private String title;
private String artist;
Next, add a constructor method in which we instantiate the instance variables:
public Song(long songID, String songTitle, String songArtist) {
id=songID;
title=songTitle;
artist=songArtist;
}
id=songID;
title=songTitle;
artist=songArtist;
}
Finally, add get methods for the instance variables:
public long getID(){return id;}
public String getTitle(){return title;}
public String getArtist(){return artist;}
public String getTitle(){return title;}
public String getArtist(){return artist;}
If you plan to use more track information, then you are free to add additional instance variables to the class.
Step 2
Open the main Activity class and add the following imports:
Open the main Activity class and add the following imports:
import java.util.ArrayList;
import java.util.Collections;
import java.util.Comparator;
import android.net.Uri;
import android.content.ContentResolver;
import android.database.Cursor;
import android.widget.ListView;
import java.util.Collections;
import java.util.Comparator;
import android.net.Uri;
import android.content.ContentResolver;
import android.database.Cursor;
import android.widget.ListView;
Declare the following instance variables before the onCreate method:
private ArrayList<Song> songList;
private ListView songView;
private ListView songView;
We will store the songs in a list and display them in the ListView instance in the main layout. In onCreate, after setting the content view, retrieve the ListView instance using the ID we gave it in the main layout:
songView = (ListView)findViewById(R.id.song_list);
Instantiate the list as shown below:
songList = new ArrayList<Song>();
Next, in the main Activity class declaration, after the existing methods, create a helper method to retrieve the audio file information:
public void getSongList() {
//retrieve song info
}
//retrieve song info
}
Inside this method, create a ContentResolver instance, retrieve the URI for external music files, and create a Cursor instance using the ContentResolver instance to query the music files:
ContentResolver musicResolver = getContentResolver();
Uri musicUri = android.provider.MediaStore.Audio.Media.EXTERNAL_CONTENT_URI;
Cursor musicCursor = musicResolver.query(musicUri, null, null, null, null);
Uri musicUri = android.provider.MediaStore.Audio.Media.EXTERNAL_CONTENT_URI;
Cursor musicCursor = musicResolver.query(musicUri, null, null, null, null);
Now we can iterate over the results, first checking that we have valid data:
if(musicCursor!=null && musicCursor.moveToFirst()){
//get columns
int titleColumn = musicCursor.getColumnIndex
(android.provider.MediaStore.Audio.Media.TITLE);
int idColumn = musicCursor.getColumnIndex
(android.provider.MediaStore.Audio.Media._ID);
int artistColumn = musicCursor.getColumnIndex
(android.provider.MediaStore.Audio.Media.ARTIST);
//add songs to list
do {
long thisId = musicCursor.getLong(idColumn);
String thisTitle = musicCursor.getString(titleColumn);
String thisArtist = musicCursor.getString(artistColumn);
songList.add(new Song(thisId, thisTitle, thisArtist));
}
while (musicCursor.moveToNext());
}
We first retrieve the column indexes for the data items that we are interested in for each song, then we use these to create a new Song object and add it to the list, before continuing to loop through the results.
Back in onCreate, after the code we added, call this new method:
Back in onCreate, after the code we added, call this new method:
getSongList();
3. Display the Songs
Step 1
Now we can display the list of songs in the user interface. In the onCreate method, after calling the helper method we created a moment ago, let's sort the data so that the songs are presented alphabetically:
Now we can display the list of songs in the user interface. In the onCreate method, after calling the helper method we created a moment ago, let's sort the data so that the songs are presented alphabetically:
Collections.sort(songList, new Comparator<Song>(){
public int compare(Song a, Song b){
return a.getTitle().compareTo(b.getTitle());
}
});
public int compare(Song a, Song b){
return a.getTitle().compareTo(b.getTitle());
}
});
We use the title variable in the Song class, using the get methods we added, to implement a comparemethod, sorting the songs by title.
Step 2
Let's define a layout to represent each song in the list. Add a new file to your project's res/layout folder, naming it song.xml and entering the following:
Let's define a layout to represent each song in the list. Add a new file to your project's res/layout folder, naming it song.xml and entering the following:
<LinearLayout xmlns:android="http://schemas.android.com/apk/res/android"
xmlns:tools="http://schemas.android.com/tools"
android:layout_width="fill_parent"
android:layout_height="wrap_content"
android:onClick="songPicked"
android:orientation="vertical"
android:padding="5dp" >
<TextView
android:id="@+id/song_title"
android:layout_width="fill_parent"
android:layout_height="wrap_content"
android:textColor="#FFFFFF99"
android:textSize="20sp"
android:textStyle="bold" />
<TextView
android:id="@+id/song_artist"
android:layout_width="fill_parent"
android:layout_height="wrap_content"
android:textColor="#FFFFFF99"
android:textSize="18sp" />
</LinearLayout>
Feel free to amend the layout to suit your preferences. Each song in the list will be represented by title and artist text strings, so we will use the TextViews to display this data. Notice that the LinearLayoutopening tag lists an onClick attribute. We will use this method in the main Activity class to respond to user taps on the songs in the list, playing the song represented by the list item that was tapped.
Step 3
We will use an Adapter to map the songs to the list view. Add a new class to your app, naming itSongAdapter or another name of your choice. When creating the class, give it the superclassandroid.widget.BaseAdapter. Eclipse should insert the following outline:
We will use an Adapter to map the songs to the list view. Add a new class to your app, naming itSongAdapter or another name of your choice. When creating the class, give it the superclassandroid.widget.BaseAdapter. Eclipse should insert the following outline:
public class SongAdapter extends BaseAdapter {
@Override
public int getCount() {
// TODO Auto-generated method stub
return 0;
}
@Override
public Object getItem(int arg0) {
// TODO Auto-generated method stub
return null;
}
@Override
public long getItemId(int arg0) {
// TODO Auto-generated method stub
return 0;
}
@Override
public View getView(int arg0, View arg1, ViewGroup arg2) {
// TODO Auto-generated method stub
return null;
}
}
@Override
public int getCount() {
// TODO Auto-generated method stub
return 0;
}
@Override
public Object getItem(int arg0) {
// TODO Auto-generated method stub
return null;
}
@Override
public long getItemId(int arg0) {
// TODO Auto-generated method stub
return 0;
}
@Override
public View getView(int arg0, View arg1, ViewGroup arg2) {
// TODO Auto-generated method stub
return null;
}
}
You'll need to add the following imports:
import java.util.ArrayList;
import android.content.Context;
import android.view.LayoutInflater;
import android.widget.LinearLayout;
import android.widget.TextView;
import android.content.Context;
import android.view.LayoutInflater;
import android.widget.LinearLayout;
import android.widget.TextView;
Inside the class declaration, declare the following instance variables:
private ArrayList<Song> songs;
private LayoutInflater songInf;
private LayoutInflater songInf;
We'll pass the song list from the main Activity class and use the LayoutInflater to map the title and artist strings to the TextViews in the song layout we created.
After the instance variables, give the adapter a constructor method to instantiate them:
After the instance variables, give the adapter a constructor method to instantiate them:
public SongAdapter(Context c, ArrayList<Song> theSongs){
songs=theSongs;
songInf=LayoutInflater.from(c);
}
songs=theSongs;
songInf=LayoutInflater.from(c);
}
Alter the content of the getCount method to return the size of the list:
@Override
public int getCount() {
return songs.size();
}
public int getCount() {
return songs.size();
}
You can leave the getItem and getItemId methods untouched. Update the implementation of the getViewmethod as shown below:
@Override
public View getView(int position, View convertView, ViewGroup parent) {
//map to song layout
LinearLayout songLay = (LinearLayout)songInf.inflate
(R.layout.song, parent, false);
//get title and artist views
TextView songView = (TextView)songLay.findViewById(R.id.song_title);
TextView artistView = (TextView)songLay.findViewById(R.id.song_artist);
//get song using position
Song currSong = songs.get(position);
//get title and artist strings
songView.setText(currSong.getTitle());
artistView.setText(currSong.getArtist());
//set position as tag
songLay.setTag(position);
return songLay;
}
We set the title and artist text by retrieving the correct Song instance from the list using the position index, mapping these strings to the views we added to the song layout file. We also set the position as the view tag, which will let us play the correct song when the user clicks an item in the list. Remember that the song.xml layout file included an onClick attribute. We will use the method listed there to retrieve the tag in the Activity.
Step 4
Back in the main Activity class, in the onCreate method after sorting the list, create a new instance of the Adapter class and set it on the ListView:
Back in the main Activity class, in the onCreate method after sorting the list, create a new instance of the Adapter class and set it on the ListView:
SongAdapter songAdt = new SongAdapter(this, songList);
songView.setAdapter(songAdt);
songView.setAdapter(songAdt);
When you run the app, it should present the list of songs on the device, clicking them will cause the app to throw an exception at the moment, but we will implement the click handler in the next tutorial.
Conclusion
We've now set the app up to read songs from the user device. In the next part, we will begin playback when the user selects a song using the MediaPlayer class. We will implement playback using a Serviceclass so that it will continue as the user interacts with other apps. Finally, we will use a MediaControllerclass to give the user control over playback.